Tie-Dyed (Dip-Dyed) Paper Towels
These tie-dyed paper towels are the COOLEST (dare we say hippest?) art project we’ve seen in a while. Okay, so they’re not actually tie-dyed, they are dip-dyed, either way, they are way cool. They are ridiculously quick and easy to make, there is almost no way to mess them up and every child’s creation comes out looking awesome and unique. All of the above creations were made by talented little Pre-K artists all on their own! Check out how below.

To Get Started, You Will Need:
- An ample supply of white, non-printed, square-shaped paper towels for each child. Two rectangle-shaped paper towels still attached at the perforation works fine too.
- Liquid watercolors (we use Colorations watercolors, available on Amazon)
- Shallow, open containers for dipping paper towels in (mini muffin pans work great).
- Wax paper to set wet creations on

Like with traditional tie-dying, how you fold your paper towel will affect the appearance of the final product. So, we tried some different folds and also encouraged our kiddos to do some freeform folds.
The first fold we did was a triangle fold.

Fold one corner of the square over diagonally to the opposite corner (your paper towel may not be a perfect square, it’s okay).

With the long side of the triangle closest to you, fold the triangle in half so the right corner matches up with the left corner.

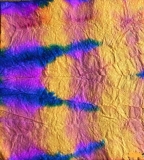
Continue folding in half and matching long side corners until you have a tight little triangle (above). Then you’re ready to dip!

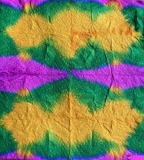
We dipped each of our corners in a primary color. Then, we folded the triangle a little so we could dip the long side in the green. When it dried a bit, we unfolded it to find this:

A few students tried a square fold:


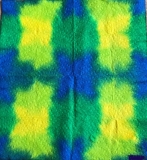
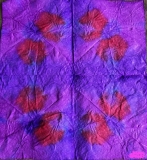
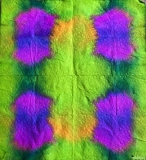
When the square was neatly folded, we dipped two corners in purple, one in blue and one corner and edge in red.


And when we unfolded it completely, we got this:

The third fold we tried was a fan fold, which we then folded in half again.


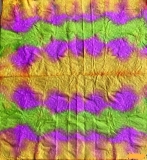
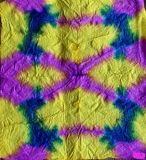
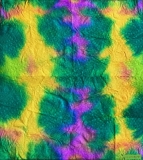
We dipped one end in yellow and the other in purple and just let the two colors seep. Unexpectedly, the blue gradually separated out from the purple and met the yellow, creating this cool ombre effect and a surprise line of green. The kiddos were delighted! This prompted a “remember when we learned…” discussion on color mixing, and the children were so excited to see what they’d learned previously playing out before their eyes.

And after it dried, we unfolded it and found this:

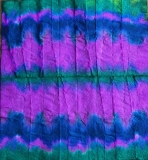
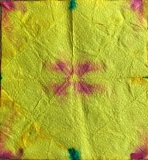
The kiddos loved trying different folds and different color combinations to see the effects. We used full-color watercolors on the above attempts. We also used slightly diluted water colors on a few samples as well. The green and blue below was done with diluted water colors:

Some tips:
- Keep only a small amount of paint in each well and refill frequently. The paper towels soak up paint rapidly and you can quickly end up with an all-one-color paper towel if you have too much paint in a well.
- Not every white part needs to be covered. The paint seeps into the paper towel as it sits.
- As the children switch from one color to the next, encourage them to rotate the folded paper towel before they dip again to create different designs.
- Have enough paper towels on hand for each child to do several attempts. The project goes very quickly and once they get the hang of the process, they will likely want to create all different shapes, patterns and color mixtures.
- Don’t unfold the towels until they’ve had a chance to sit for a bit. The paint is still seeping into the white parts of the towels, and mixing and creating new colors. You don’t, however, want to wait until they’re completely dry, because the dried towels may stick and rip as you unfold them.
Now that you have your tie-dyed paper towels, what can you do with them?
We ran ours through the laminator when dry to give them some clear stability, rotated them so they were diamond-shaped, then tied on strings to the bottom points to make them into kites. We hung these beauties in the window and they glowed as the sun shone through them!
Other cool ideas:
- Glue the paper towels onto a backing of construction paper or cardstock, cut slightly larger, to create a simple “frame”.
- Fold the paper towels into tight triangles and round off the points. Wrap one end of a pipe cleaner tightly around one long point, then carefully spread each fold out to create a paper flower.
- Cut out a t-shirt shape from the paper towel and glue on construction paper or cardstock to create a cool tie-dyed shirt card for dads for Father’s Day.
Got other ideas? Tell us in the comments below!

